5 Expert Tips for Bathroom Remodeling: Complete Your Bathroom Renovation like a Pro

5 expert tips for bathroom remodeling that will boost your home’s value

If you’re thinking about redesigning your bathroom, you’re undoubtedly excited about the idea of creating an elegant and practical room. But, upgrading a bathroom can be a daunting undertaking with many choices and pitfalls to watch out for.

We’ve compiled five professional suggestions to help you build your ideal bathroom without any hassles or disappointments. These suggestions can help you steer clear of typical blunders and complete a flawless remodel.

So, let’s dive right in and help you achieve perfect bathroom remodeling outcomes!

5 Tips for Avoiding Completing a Successful Bathroom Remodel

Select the Right Materials

  • Choosing the perfect materials is essential for the successful bathroom remodeling. Every aspect, from flooring and tiles to fixtures and countertops, can make a significant difference.

When deciding on materials, consider the overall appearance and style you’re aiming for. Do you want a modern or traditional vibe? Would you prefer a sleek, minimalist look or a more inviting and cozy atmosphere?

  • Apart from aesthetics, it’s crucial to select durable and low-maintenance materials. It’s best to search for products resistant to moisture, mold, and mildew since these issues can be prevalent in bathrooms.

Incorporate Universal Design Features

  • Regardless of your age or physical capacity, it is advisable to incorporate universal design elements in your bathroom renovation. These elements improve the usability and accessibility of the restroom for everyone, irrespective of their mobility or disabilities.

A walk-in shower, grab bars and handrails, and sufficient restroom lighting are a few examples of universal design features. By including these components, you can design a stylish, practical bathroom that meets your needs.

Don’t Overlook the Minor Aspects

  • When renovating a bathroom, paying attention to the details is crucial. While significant factors such as flooring and fixtures are essential, minor touches can have a considerable influence. Although toilet paper holders, soap dispensers, and towel bars may seem inconsequential, they significantly impact how your bathroom looks and feels.

Another thing to think about is lighting. Your bathroom’s functionality and aesthetic can both be enhanced by lighting. Dimmer switches and many lighting layers can help create a cozy and inviting atmosphere. Don’t forget to select lighting fixtures that go with the overall design of your bathroom. Your bathroom may become stunning and valuable by paying attention to small details like decorations and lighting.

Plan Ahead and Set a Realistic Budget

  • Setting a realistic budget and doing some advance planning is essential before starting any bathroom remodeling project. Consider your remodeling objectives, including what you want to accomplish and your budgetary constraints. Create a list of must-haves and nice-to-haves, and prioritize your expenses consequently.

Consider including a contingency budget to cover unforeseen costs. Bathroom remodeling projects can be erratic, and you never know what problems you might experience. Acquire quotes from multiple vendors to understand the cost of bathroom remodeling.

Hire an Experienced Contractor

  • tips for bathroom remodelingIt can be tempting to take on a bathroom remodeling project yourself, but hiring a professional contractor is usually the best option.  A contractor can assist you in navigating the intricacies of the project, ensuring that all work adheres to building codes and preventing expensive errors.

When selecting a contractor, take the time to conduct research and find someone with a solid track record and experience.  Look for reviews and feedback from previous clients, and don’t hesitate to request references. It’s essential to have a contractor who can communicate effectively, listen to your needs, and offer innovative solutions to bring your vision to life. Now that you have acquired a wealth of knowledge on bathroom remodeling and are armed with helpful tips to assist you in creating the perfect bathroom you’ve always desired, you can avoid basic pitfalls and ensure a successful remodeling project.

Dupont Kitchens and Bathrooms is an expert in assisting homeowners in fulfilling their remodeling goals. Our skilled team is committed to providing top-notch services tailored to each client’s requirements and preferences. Please request a free consultation with us today to bring your dream bathroom to life!
On Key

Related Posts

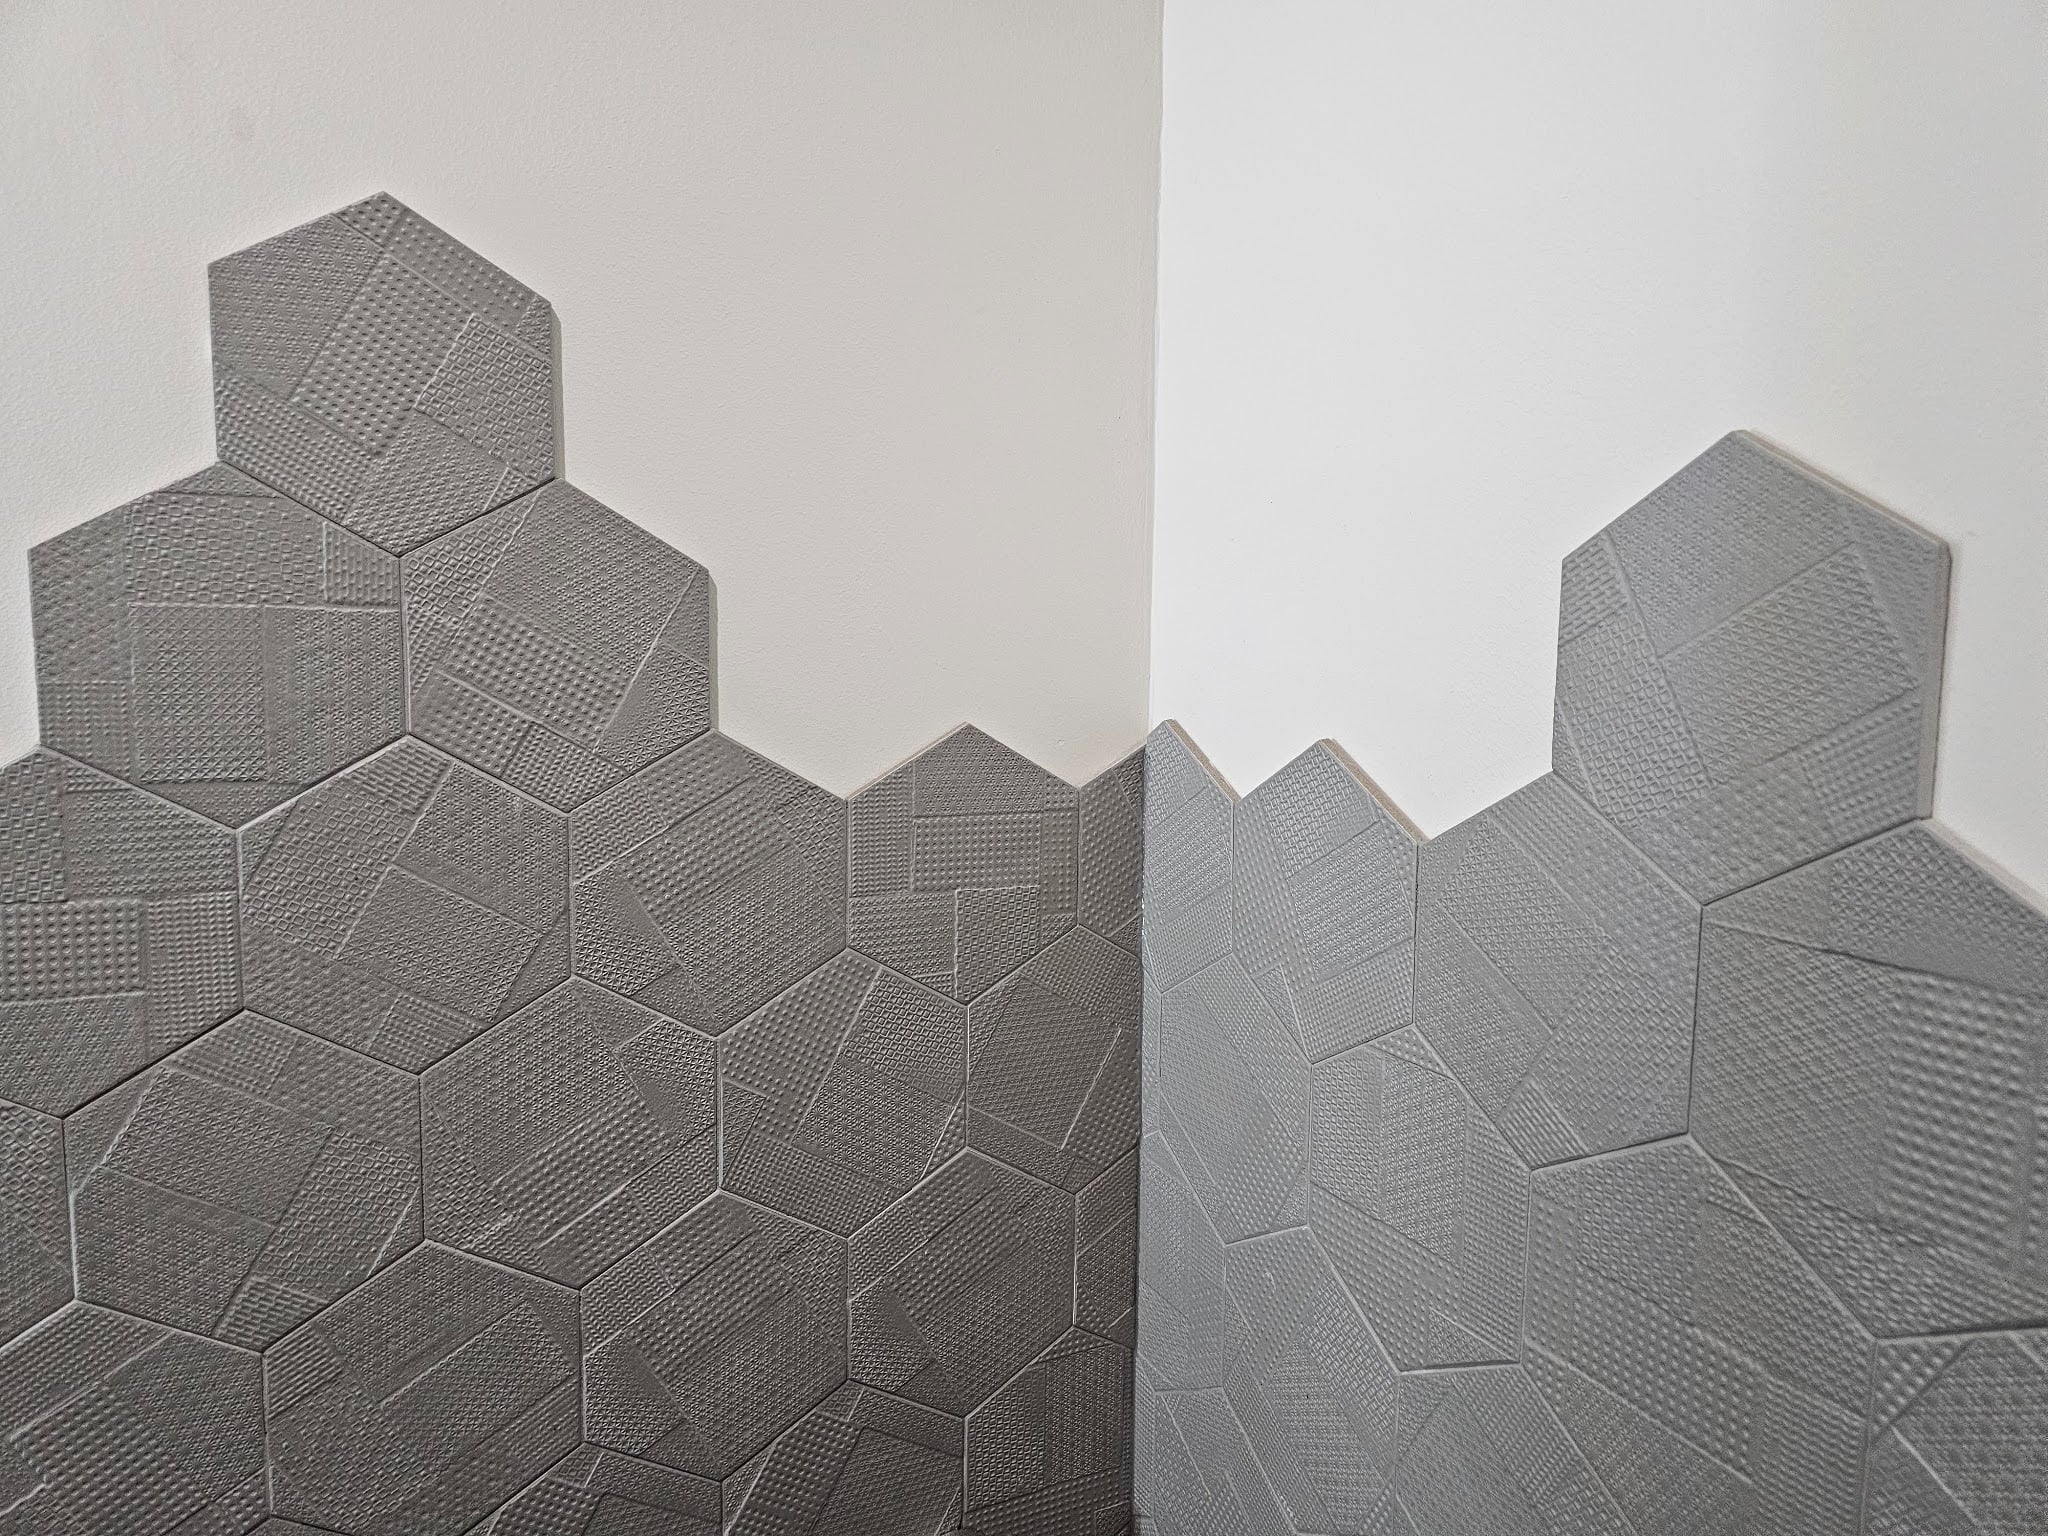
The tile used on his bathroom is an unterminated or hexagonal tile with an embossed texture. Unlike most wall tile installations which terminate all the way up at the corner of the joint between the wall plain or have a termination strip, this tile is installed with a raw staggered edge. Sometimes an edge like this is called a floating edge. If you look in the picture below, you can see that the tile at the vertical inside corner of the wall is cut to fit the shape provided by the wall plane. The top of the tile though is left raw to just follow a staggered edge of the hexagonal tile itself. The staggered unterminated edge of the tile doesn't necessarily look bad, in this example. They've been careful during installation to not let mortar ooze out in a way that looks rough or unfinished. At the lower tiles though, in the picture below, you can see the top of that unterminated edge. There are two problems with that kind of unterminated edge. First, you can see the raw edge of the tile itself. Since this is not a solid piece of natural material, the front or exposed face of the tile is a different color than the internal composition or body of the tile. When it's exposed like this and doesn't have a terminating edge you can see that difference which makes it visually apparent that it's not a real material. It's a manufactured material. The second problem with this type of unterminated edge is that the mortar itself has a thickness of roughly 1/8 of an inch. When applied with a 3/16 inch Notch trowel, the mortar becomes compressed but still even when flattened as much as possible there still is a thickness of that mortar. Once it is dry and cured, you can still see the thickness of that mortar. In almost all cases of tile installation, unlike stone masonry or even brick masonry, the tile mortar is not intended to be exposed at the joints. In between joints, in the field of the tile, the mortar will be covered with a colored grout. In this case, the tiles are set so tightly that there is almost no visible grout line between them. The grout used is a color that's very similar to the tile and the effect works. In some cases when the tile has a variation of significant color difference between the ranges of colors within the tile it's difficult to have a grout that complements or blends. Here though because the colors continuous across the face of the tile and the grout has been matched so well, you can't even hardly notice it. You can see that joint or between the back of the tile and the wall very clearly in the next picture below. You can see there's a very thin line with a black dark shadow between the tile and the wall. In some cases, when a tile is left unterminated at the edge, a gun applied caulking can be applied across the edge, smoothed, to almost make it look intentional. Sometimes in bathrooms without really good ventilation, if there's steam from hot water, that steam can condensate and build on the wall. When the vapor droplets accumulate enough they'll roll down the wall and in this case they'll sit on top of and get back behind the edge of the tile. That's one of the downsides, here though, this bathroom is just like a powder room with a toilet and a sink, but it doesn't have a shower. Most of the steam moisture buildup in bathrooms comes from showers. In the picture below you can see the distance between the other side of the ceiling and the top of the tile. Here they were at least smart enough to bring the top of the tile to a point that's above eye level. Typical eye levels are around 60 to 75 inches above the finished floor height. The mirror used above the bathroom sink has an integral LED light that wraps the perimeter of the round mirror. It basically provides a dramatic high contrast to the adjacent tile. That high contrast accentuates the texture of the tile. This tile has this intentional embossed or relief texture which is well employed when lit in a way that emphasizes the texture. The next picture below shows a close-up view of that edge at the top of the tile. Dupont Kitchen & Bath Can Help As dedicated and local DC metropolitan kitchen and bath builders and installers, we pride ourselves on turning your visions into reality. Your kitchen and bathrooms can reflect your unique style and be designed with personalized aesthetics. It can be a process from creative designs to the realization of your dream space. Specializing in kitchen and bath construction, we bring expertise and skills to every project. If you're contemplating a renovation, upgrade, or modernization in the local market, we're happy to be your team. Consult with us, and we can start together on a path to redefine and elevate your DC living experience. You can visit our company website at https://dupontkitchenbathdc.com/ Here at our website you will find a simple and convenient web form that you can fill to contact us quickly.

Hex Wall Tile

Modern Hex Wall Tile for Bathrooms in Washington DC The tile used on his bathroom is an unterminated or hexagonal tile with an embossed texture.